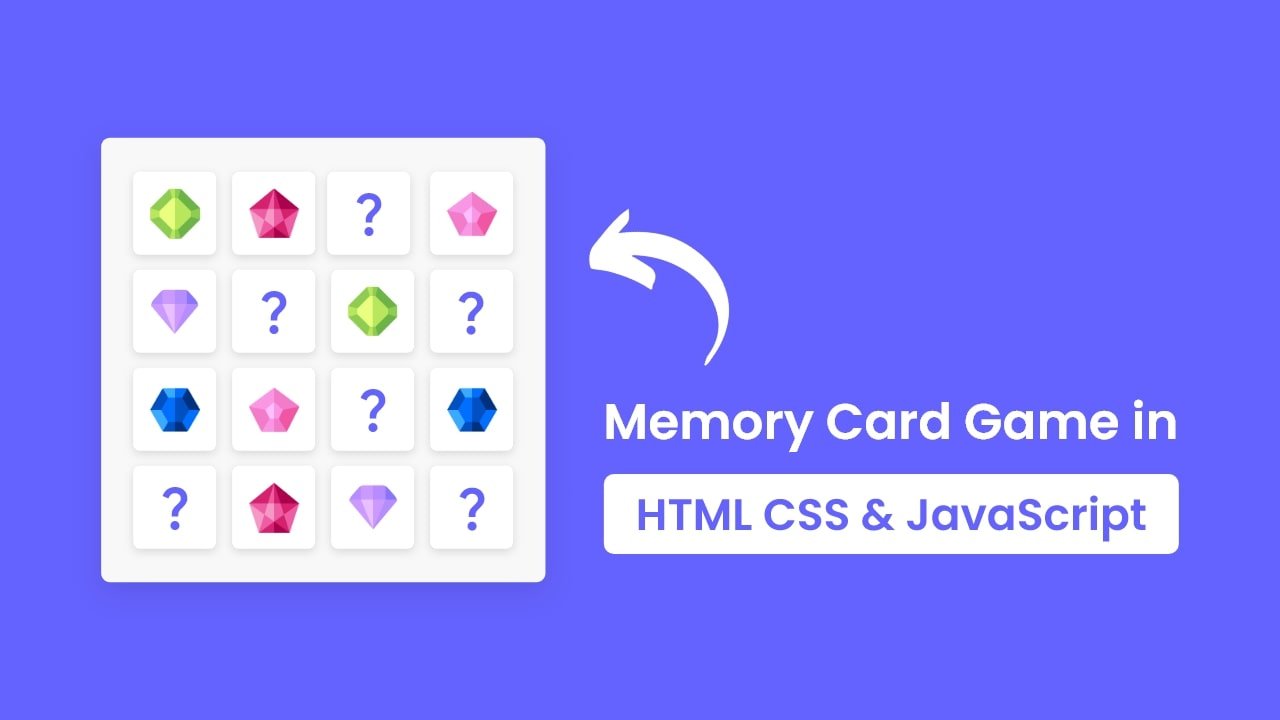
Hello friends, today in this blog, you’ll learn how to Build A Memory Card Game in HTML CSS & JavaScript. In the earlier blog, I have shared how to build a Typing Speed Test Game in JavaScript, and now it’s time to create a memory or matching cards game.
Memory card is a simple matching cards game in which all the cards are flipped backside on a surface, and two cards are flipped face up over each turn. The objective of this game is to match all the pairs of cards.
In this game (Memory Card Game in JavaScript), You’ll see the two demos. In demo 1, there are 16 cards where every two cards have the same images, but each card is placed randomly, and you have to find them. There is no time limit to find the pairs of cards.
In demo 2, everything is the same as in demo 1, but there is a time limit of 30 seconds, and you have to find the pair of cards in this given time. If you’re feeling difficult to understand what I’m saying, you can watch demos or a full video tutorial of this game.
Video Tutorial of Memory Card Game in JavaScript
I hope you have seen the above video, where I have shown the demos of this memory card game and how I created it using HTML CSS & JavaScript. If you’re too beginner and didn’t build any JavaScript project before, then you may have difficulties to understand the codes of this game.
So, I would suggest you watch the video 2-3 times and try to understand each JavaScript line of this game because I have explained the JavaScript codes with written comments which help you to understand the codes more easily but if you liked these matching cards game and want to get source codes or files, you can get them from the bottom of this page.
You might like this:
- Dictionary Web Application JavaScript
- Random Quotes Generator in JavaScript
- Text To Speech Converter in JavaScript
- Awesome Quiz Web Application JavaScript
Memory Card Game in JavaScript [Source Codes]
To create this Memory or Matching Card Game in JavaScript. First, you need to create three Files: HTML, CSS & JavaScript File. After creating these files, you have to paste the given codes into your file.
Remember, If you copy-paste the codes, then you won’t get images that are used in this game, and also you won’t get source codes of demo 2 of this game. If you want these, you can easily download the source files of this memory card game from the bottom download button.
First, create an HTML file with the name of index.html and paste the given codes into your HTML file. You’ve to create a file with .html extension.
<!DOCTYPE html>
<!-- Coding By CodingNepal - youtube.com/codingnepal -->
<html lang="en" dir="ltr">
  <head>
    <meta charset="utf-8">
    <title>Memory Card Game in JavaScript | CodingNepal</title>
    <link rel="stylesheet" href="style.css">
    <meta name="viewport" content="width=device-width, initial-scale=1.0">
  </head>
  <body>
    <div class="wrapper">
      <ul class="cards">
        <li class="card">
          <div class="view front-view">
            <img src="images/que_icon.svg" alt="icon">
          </div>
          <div class="view back-view">
            <img src="images/img-1.png" alt="card-img">
          </div>
        </li>
        <li class="card">
          <div class="view front-view">
            <img src="images/que_icon.svg" alt="icon">
          </div>
          <div class="view back-view">
            <img src="images/img-6.png" alt="card-img">
          </div>
        </li>
        <li class="card">
          <div class="view front-view">
            <img src="images/que_icon.svg" alt="icon">
          </div>
          <div class="view back-view">
            <img src="images/img-3.png" alt="card-img">
          </div>
        </li>
        <li class="card">
          <div class="view front-view">
            <img src="images/que_icon.svg" alt="icon">
          </div>
          <div class="view back-view">
            <img src="images/img-2.png" alt="card-img">
          </div>
        </li>
        <li class="card">
          <div class="view front-view">
            <img src="images/que_icon.svg" alt="icon">
          </div>
          <div class="view back-view">
            <img src="images/img-1.png" alt="card-img">
          </div>
        </li>
        <li class="card">
          <div class="view front-view">
            <img src="images/que_icon.svg" alt="icon">
          </div>
          <div class="view back-view">
            <img src="images/img-5.png" alt="card-img">
          </div>
        </li>
        <li class="card">
          <div class="view front-view">
            <img src="images/que_icon.svg" alt="icon">
          </div>
          <div class="view back-view">
            <img src="images/img-2.png" alt="card-img">
          </div>
        </li>
        <li class="card">
          <div class="view front-view">
            <img src="images/que_icon.svg" alt="icon">
          </div>
          <div class="view back-view">
            <img src="images/img-6.png" alt="card-img">
          </div>
        </li>
        <li class="card">
          <div class="view front-view">
            <img src="images/que_icon.svg" alt="icon">
          </div>
          <div class="view back-view">
            <img src="images/img-3.png" alt="card-img">
          </div>
        </li>
        <li class="card">
          <div class="view front-view">
            <img src="images/que_icon.svg" alt="icon">
          </div>
          <div class="view back-view">
            <img src="images/img-4.png" alt="card-img">
          </div>
        </li>
        <li class="card">
          <div class="view front-view">
            <img src="images/que_icon.svg" alt="icon">
          </div>
          <div class="view back-view">
            <img src="images/img-5.png" alt="card-img">
          </div>
        </li>
        <li class="card">
          <div class="view front-view">
            <img src="images/que_icon.svg" alt="icon">
          </div>
          <div class="view back-view">
            <img src="images/img-4.png" alt="card-img">
          </div>
        </li>
        <li class="card">
          <div class="view front-view">
            <img src="images/que_icon.svg" alt="icon">
          </div>
          <div class="view back-view">
            <img src="images/img-4.png" alt="card-img">
          </div>
        </li>
        <li class="card">
          <div class="view front-view">
            <img src="images/que_icon.svg" alt="icon">
          </div>
          <div class="view back-view">
            <img src="images/img-4.png" alt="card-img">
          </div>
        </li>
        <li class="card">
          <div class="view front-view">
            <img src="images/que_icon.svg" alt="icon">
          </div>
          <div class="view back-view">
            <img src="images/img-4.png" alt="card-img">
          </div>
        </li>
        <li class="card">
          <div class="view front-view">
            <img src="images/que_icon.svg" alt="icon">
          </div>
          <div class="view back-view">
            <img src="images/img-4.png" alt="card-img">
          </div>
        </li>
      </ul>
    </div>

    <script src="script.js"></script>

  </body>
</html>
Second, create a CSS file with the name of style.css and paste the given codes in your CSS file. Remember, you’ve to create a file with .css extension.
/* Import Google Font - Poppins */
@import url('https://fonts.googleapis.com/css2?family=Poppins:wght@400;500;600;700&display=swap');
*{
  margin: 0;
  padding: 0;
  box-sizing: border-box;
  font-family: 'Poppins', sans-serif;
}
body{
  display: flex;
  align-items: center;
  justify-content: center;
  min-height: 100vh;
  background: #6563FF;
}
.wrapper{
  padding: 25px;
  border-radius: 10px;
  background: #F8F8F8;
  box-shadow: 0 10px 30px rgba(0,0,0,0.1);
}
.cards, .card, .view{
  display: flex;
  align-items: center;
  justify-content: center;
}
.cards{
  height: 400px;
  width: 400px;
  flex-wrap: wrap;
  justify-content: space-between;
}
.cards .card{
  cursor: pointer;
  list-style: none;
  user-select: none;
  position: relative;
  perspective: 1000px;
  transform-style: preserve-3d;
  height: calc(100% / 4 - 10px);
  width: calc(100% / 4 - 10px);
}
.card.shake{
  animation: shake 0.35s ease-in-out;
}
@keyframes shake {
  0%, 100%{
    transform: translateX(0);
  }
  20%{
    transform: translateX(-13px);
  }
  40%{
    transform: translateX(13px);
  }
  60%{
    transform: translateX(-8px);
  }
  80%{
    transform: translateX(8px);
  }
}
.card .view{
  width: 100%;
  height: 100%;
  position: absolute;
  border-radius: 7px;
  background: #fff;
  pointer-events: none;
  backface-visibility: hidden;
  box-shadow: 0 3px 10px rgba(0,0,0,0.1);
  transition: transform 0.25s linear;
}
.card .front-view img{
  width: 19px;
}
.card .back-view img{
  max-width: 45px;
}
.card .back-view{
  transform: rotateY(-180deg);
}
.card.flip .back-view{
  transform: rotateY(0);
}
.card.flip .front-view{
  transform: rotateY(180deg);
}

@media screen and (max-width: 700px) {
  .cards{
    height: 350px;
    width: 350px;
  }
  .card .front-view img{
    width: 17px;
  }
  .card .back-view img{
    max-width: 40px;
  }
}

@media screen and (max-width: 530px) {
  .cards{
    height: 300px;
    width: 300px;
  }
  .card .front-view img{
    width: 15px;
  }
  .card .back-view img{
    max-width: 35px;
  }
}
Last, create a JavaScript file with the name of script.js and paste the given codes in your JavaScript file. Remember, you’ve to create a file with .js extension.
const cards = document.querySelectorAll(".card");

let matched = 0;
let cardOne, cardTwo;
let disableDeck = false;

function flipCard({target: clickedCard}) {
    if(cardOne !== clickedCard && !disableDeck) {
        clickedCard.classList.add("flip");
        if(!cardOne) {
            return cardOne = clickedCard;
        }
        cardTwo = clickedCard;
        disableDeck = true;
        let cardOneImg = cardOne.querySelector(".back-view img").src,
        cardTwoImg = cardTwo.querySelector(".back-view img").src;
        matchCards(cardOneImg, cardTwoImg);
    }
}

function matchCards(img1, img2) {
    if(img1 === img2) {
        matched++;
        if(matched == 8) {
            setTimeout(() => {
                return shuffleCard();
            }, 1000);
        }
        cardOne.removeEventListener("click", flipCard);
        cardTwo.removeEventListener("click", flipCard);
        cardOne = cardTwo = "";
        return disableDeck = false;
    }
    setTimeout(() => {
        cardOne.classList.add("shake");
        cardTwo.classList.add("shake");
    }, 400);

    setTimeout(() => {
        cardOne.classList.remove("shake", "flip");
        cardTwo.classList.remove("shake", "flip");
        cardOne = cardTwo = "";
        disableDeck = false;
    }, 1200);
}

function shuffleCard() {
    matched = 0;
    disableDeck = false;
    cardOne = cardTwo = "";
    let arr = [1, 2, 3, 4, 5, 6, 7, 8, 1, 2, 3, 4, 5, 6, 7, 8];
    arr.sort(() => Math.random() > 0.5 ? 1 : -1);
    cards.forEach((card, i) => {
        card.classList.remove("flip");
        let imgTag = card.querySelector(".back-view img");
        imgTag.src = `images/img-${arr[i]}.png`;
        card.addEventListener("click", flipCard);
    });
}

shuffleCard();

cards.forEach(card => {
    card.addEventListener("click", flipCard);
});
That’s all, now you’ve successfully built a Memory Card Game in HTML CSS & JavaScript. If your code doesn’t work or you’ve faced any problem, please download the source code files from the given download button. It’s free and a .zip file will be downloaded then you’ve to extract it. After you extracted this zip file, you’ll get two folders of both demo 1 and demo 2 of this game.


