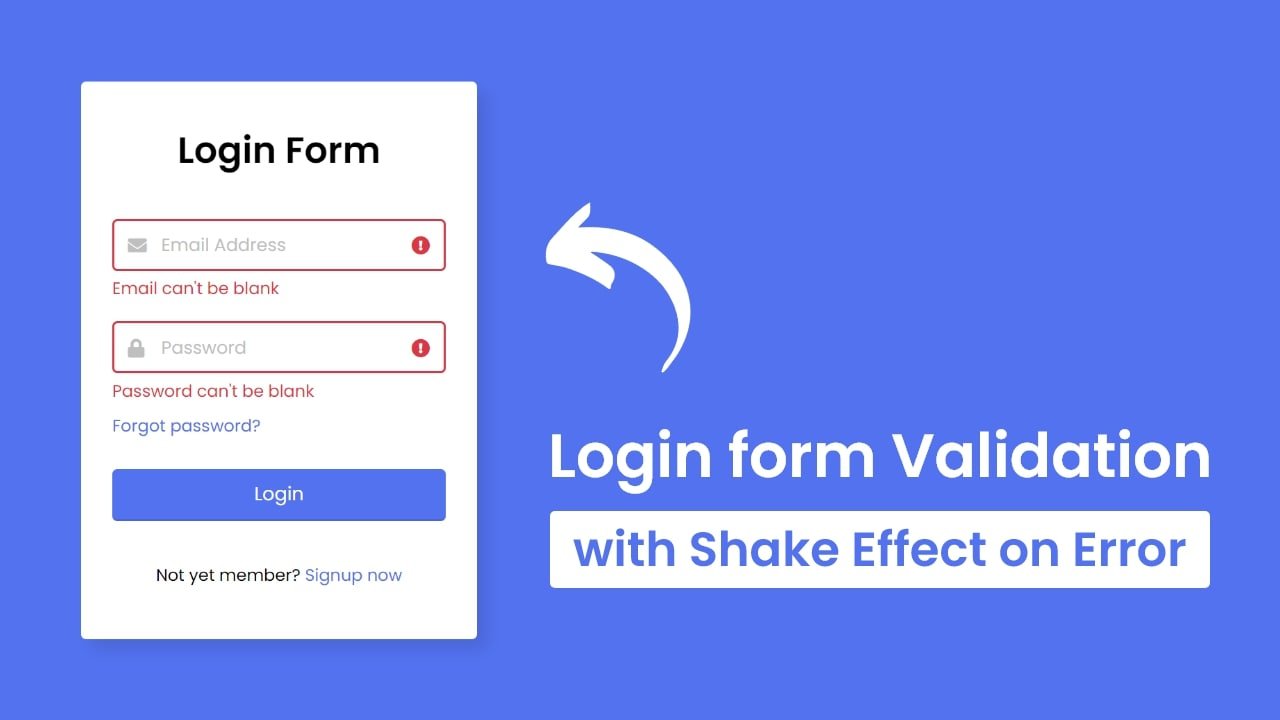
Hey friends, today in this blog you’ll learn how to create a Login Form Validation with Shake Effect in HTML CSS & JavaScript. In the earlier blog, I’ve shared how to create Login & Registration Form using HTML & CSS and now it’s time to validate the login form using JavaScript.
Form Validation in HTML means to check that the user’s entered credential – Email, Username, Password is valid and correct or not. User will not get access to the restricted page until he/she entered a valid email and password. And, Shake Effect in this Login Form means when the user clicks on the login button without entering their email and password then the input boxes shake to inform the user that these fields can’t be blank.
In our Login Form Validation in HTML & JavaScript, as you can see on the image preview, there is a login form that holds login text, two input fields, a login button, etc. at first those login errors are not shown but when the user clicks on the login button without entering their email & password then there is appear these errors with shake effect.
Once the user starts entering their credentials in the input fields then these errors will automatically hide. If you are feeling difficulties with what I’m saying then you can watch a video tutorial of this Login Form Validation in HTML with Shake Effect.
Video Tutorial of Form Validation in HTML & JavaScript
In the video, you’ve clearly seen how this login form looks like and how it show an error when the user tries to log in without entering an email and password or without entering a valid email address. This login form is created only for design purposes so when you entered a valid email & password and click on the login button then these details won’t send or submit anywhere.
If you want to send these details anywhere and want to receive them using PHP then you’ve to put that PHP file URL inside the action attribute of the form tag. I’ve already shared a blog on how to create Login & Registration Form with Email Verification using PHP. If you want to make this form workable and dynamic then don’t forget to read the mentioned blog.
You might like this:
- Multi-step Signup Form UI Design
- Animated Login & Registration Form
- Responsive Contact us UI Form Design
- Login & Signup Form with PHP & MySQL
Form Validation in HTML & JavaScript [Source Codes]
To create this program [Form Validation in HTML & JavaScript]. First, you need to create three Files: HTML, CSS & JavaScript File. After creating these files just paste the following codes into your file. You can also download the source code files of this Form Validation in HTML from the given download button.
First, create an HTML file with the name of index.html and paste the given codes into your HTML file. Remember, you’ve to create a file with .html extension.
<!DOCTYPE html>
<!-- Coding By CodingNepal - youtube.com/codingnepal -->
<html lang="en">
<head>
  <meta charset="UTF-8">
  <meta name="viewport" content="width=device-width, initial-scale=1.0">
  <title>Login Form validation in HTML & CSS | CodingNepal</title>
  <link rel="stylesheet" href="style.css">
  <link rel="stylesheet" href="https://cdnjs.cloudflare.com/ajax/libs/font-awesome/5.15.3/css/all.min.css"/>
</head>
<body>
  <div class="wrapper">
    <header>Login Form</header>
    <form action="#">
      <div class="field email">
        <div class="input-area">
          <input type="text" placeholder="Email Address">
          <i class="icon fas fa-envelope"></i>
          <i class="error error-icon fas fa-exclamation-circle"></i>
        </div>
        <div class="error error-txt">Email can't be blank</div>
      </div>
      <div class="field password">
        <div class="input-area">
          <input type="password" placeholder="Password">
          <i class="icon fas fa-lock"></i>
          <i class="error error-icon fas fa-exclamation-circle"></i>
        </div>
        <div class="error error-txt">Password can't be blank</div>
      </div>
      <div class="pass-txt"><a href="#">Forgot password?</a></div>
      <input type="submit" value="Login">
    </form>
    <div class="sign-txt">Not yet member? <a href="#">Signup now</a></div>
  </div>

  <script src="script.js"></script>

</body>
</html>
Second, create a CSS file with the name of style.css and paste the given codes in your CSS file. Remember, you’ve to create a file with .css extension.
@import url('https://fonts.googleapis.com/css2?family=Poppins:wght@400;500;600&display=swap');
*{
  margin: 0;
  padding: 0;
  box-sizing: border-box;
  font-family: "Poppins", sans-serif;
}
body{
  width: 100%;
  height: 100vh;
  display: flex;
  align-items: center;
  justify-content: center;
  background: #5372F0;
}
::selection{
  color: #fff;
  background: #5372F0;
}
.wrapper{
  width: 380px;
  padding: 40px 30px 50px 30px;
  background: #fff;
  border-radius: 5px;
  text-align: center;
  box-shadow: 10px 10px 15px rgba(0,0,0,0.1);
}
.wrapper header{
  font-size: 35px;
  font-weight: 600;
}
.wrapper form{
  margin: 40px 0;
}
form .field{
  width: 100%;
  margin-bottom: 20px;
}
form .field.shake{
  animation: shake 0.3s ease-in-out;
}
@keyframes shake {
  0%, 100%{
    margin-left: 0px;
  }
  20%, 80%{
    margin-left: -12px;
  }
  40%, 60%{
    margin-left: 12px;
  }
}
form .field .input-area{
  height: 50px;
  width: 100%;
  position: relative;
}
form input{
  width: 100%;
  height: 100%;
  outline: none;
  padding: 0 45px;
  font-size: 18px;
  background: none;
  caret-color: #5372F0;
  border-radius: 5px;
  border: 1px solid #bfbfbf;
  border-bottom-width: 2px;
  transition: all 0.2s ease;
}
form .field input:focus,
form .field.valid input{
  border-color: #5372F0;
}
form .field.shake input,
form .field.error input{
  border-color: #dc3545;
}
.field .input-area i{
  position: absolute;
  top: 50%;
  font-size: 18px;
  pointer-events: none;
  transform: translateY(-50%);
}
.input-area .icon{
  left: 15px;
  color: #bfbfbf;
  transition: color 0.2s ease;
}
.input-area .error-icon{
  right: 15px;
  color: #dc3545;
}
form input:focus ~ .icon,
form .field.valid .icon{
  color: #5372F0;
}
form .field.shake input:focus ~ .icon,
form .field.error input:focus ~ .icon{
  color: #bfbfbf;
}
form input::placeholder{
  color: #bfbfbf;
  font-size: 17px;
}
form .field .error-txt{
  color: #dc3545;
  text-align: left;
  margin-top: 5px;
}
form .field .error{
  display: none;
}
form .field.shake .error,
form .field.error .error{
  display: block;
}
form .pass-txt{
  text-align: left;
  margin-top: -10px;
}
.wrapper a{
  color: #5372F0;
  text-decoration: none;
}
.wrapper a:hover{
  text-decoration: underline;
}
form input[type="submit"]{
  height: 50px;
  margin-top: 30px;
  color: #fff;
  padding: 0;
  border: none;
  background: #5372F0;
  cursor: pointer;
  border-bottom: 2px solid rgba(0,0,0,0.1);
  transition: all 0.3s ease;
}
form input[type="submit"]:hover{
  background: #2c52ed;
}
Last, create a JavaScript file with the name of script.js and paste the given codes in your JavaScript file. Remember, you’ve to create a file with .js extension.
const form = document.querySelector("form");
eField = form.querySelector(".email"),
eInput = eField.querySelector("input"),
pField = form.querySelector(".password"),
pInput = pField.querySelector("input");

form.onsubmit = (e)=>{
  e.preventDefault(); //preventing from form submitting
  //if email and password is blank then add shake class in it else call specified function
  (eInput.value == "") ? eField.classList.add("shake", "error") : checkEmail();
  (pInput.value == "") ? pField.classList.add("shake", "error") : checkPass();

  setTimeout(()=>{ //remove shake class after 500ms
    eField.classList.remove("shake");
    pField.classList.remove("shake");
  }, 500);

  eInput.onkeyup = ()=>{checkEmail();} //calling checkEmail function on email input keyup
  pInput.onkeyup = ()=>{checkPass();} //calling checkPassword function on pass input keyup

  function checkEmail(){ //checkEmail function
    let pattern = /^[^ ]+@[^ ]+\.[a-z]{2,3}$/; //pattern for validate email
    if(!eInput.value.match(pattern)){ //if pattern not matched then add error and remove valid class
      eField.classList.add("error");
      eField.classList.remove("valid");
      let errorTxt = eField.querySelector(".error-txt");
      //if email value is not empty then show please enter valid email else show Email can't be blank
      (eInput.value != "") ? errorTxt.innerText = "Enter a valid email address" : errorTxt.innerText = "Email can't be blank";
    }else{ //if pattern matched then remove error and add valid class
      eField.classList.remove("error");
      eField.classList.add("valid");
    }
  }

  function checkPass(){ //checkPass function
    if(pInput.value == ""){ //if pass is empty then add error and remove valid class
      pField.classList.add("error");
      pField.classList.remove("valid");
    }else{ //if pass is empty then remove error and add valid class
      pField.classList.remove("error");
      pField.classList.add("valid");
    }
  }

  //if eField and pField doesn't contains error class that mean user filled details properly
  if(!eField.classList.contains("error") && !pField.classList.contains("error")){
    window.location.href = form.getAttribute("action"); //redirecting user to the specified url which is inside action attribute of form tag
  }
}
That’s all, now you’ve successfully created a Login Form Validation in HTML CSS & JavaScript. If your code doesn’t work or you’ve faced any error/problem then please download the source code files from the given download button. It’s free and a .zip file will be downloaded then you’ve to extract it.


